The benefits of the pincer are two fold in the game of 40k. By attacking from two sides at once, you limit the availability of cover from your forces. Unless your enemy is going to hunker down in cover (which is not a bad thing), he simply can't protect himself from the firing of both attacking elements at the same time.
The second benefit is that you can assault from two directions as well. This means your enemy is not going to be able to hide weaker units from assault, and you can generally overwhelm the unit you're attacking.
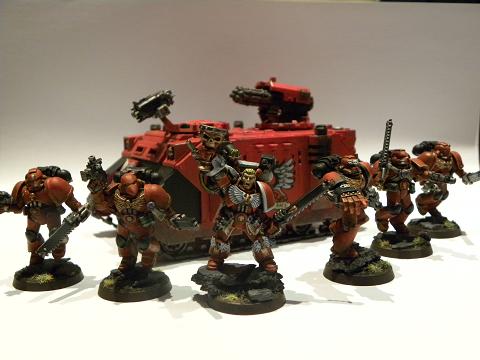
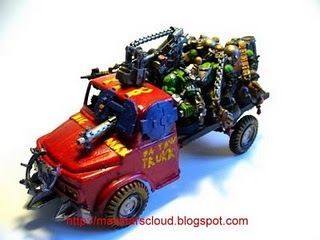
A popular approach for this kind of attack is to take the MSU approach. Multiple Small Unit means you have lots of smaller units, generally in transports, that can be in several places at one time. Good examples of this are Razorbacks with combat squads of space marines and Ork Truk Boyz squads.
The reason these types of squads are popular is because:
- They are cheap, allowing you to take several of the same type of unit and allowing you to create multiple flanking units with ease.
- With both guns on the transport and a good assault unit inside, one unit allows you to perform both the shooting and assaulting role in a single package. And even if the enemy manages to take out your tanks after they bring their firepower to bear, you still have multiple small assault units to swarm and envelop the bad guy.
Like every military maneuver, there IS a counter strategy... and sometimes several. The pincer movement is no different. It is important to know the defenses against a pincer so that you can counter your enemy's pincer movement, and also recognize when the battlefield is not set up well for you to launch your own.
The key to breaking the pincer is to remember two key factors. First, by splitting up his forces to attack on two flanks, your enemy's forces are weaker on each side than you are in your center. Second, by attacking your flanks, he is also presenting the back side of his forces to your own reinforcements -- essentially putting himself in the position of being enveloped while he is trying to envelop you.
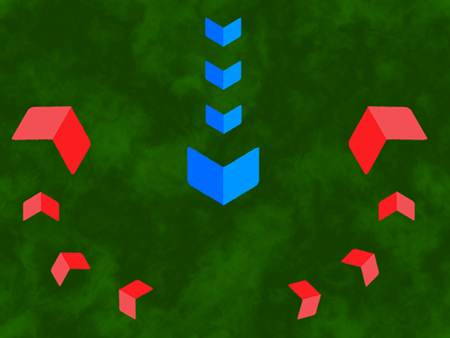
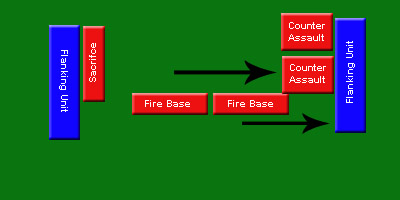
If you often find yourself the victim of a pincer, or you're facing an army that is set up well to deliver one, your chief defense against it is to create hard pockets of resistance that are hard to envelop. For instance, look at the picture below. Each element, which may or may not be in cover, has a counter element to your enemy's attack: it has a firepower element as well as a counter assault element. Because you've paired these units up, and spread them out just a little, it is difficult for your enemy to get in between your deployed units without finding himself in a crossfire situation and open to a counter assault on the back side of his forces.
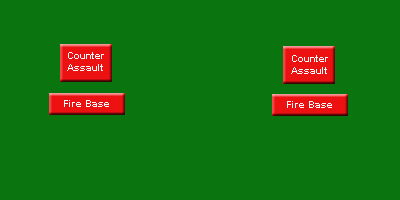
And you can repeat this deployment across your entire deployment zone creating several hard pockets that are difficult to outflank without offering up a soft underbelly that you can pounce on in your own turn. Remember that this does not have to be a stagnant deployment. Yes, this could be a tactical squad backed up by an assault squad - both hunkered down in cover. But it could also be a terminator squad backed up by a vanguard unit. Or it could be termagaunts backed up by warriors. This set up can be as mobile as you like, the idea is just to create hard pockets of resistance that can act as both fire support and counter assault to relieve any of their neighboring units.
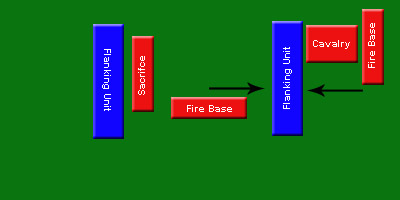
If you don't have an army that spreads out in pairings well, then you can also take advantage of the fact that your enemy is weaker at any one of your flanks. As is illustrated in the picture below, if you find your larger position flanked from either side, you can pick the side you think you an overwhelm, and then create an all out assault to eliminate one of your enemy's flanking forces and then turn on the small element that is left over.

The key here is target priority. Throw something at the rear flank to tie up the assaulting element, and then use everything else you have to wipe out the enemy's other flanking units. This means concentrating firepower one one dangerous unit at a time so that you can eliminate the opposing force as quickly as possible so that you can then turn around and do the same thing to the other flanking force. Or you can run if you have a mobile force that won't stand up to the other flanking attack. The point is simply that you should take advantage of the fact that you have superior numbers against any single flanking force, and that you shouldn't try to go toe-to-toe. You should give him a stumbling block and then overwhelm one full part of his force. If you do it correctly, you may lose the sacrifice squad, but you'll still have the bulk of your force left over to eliminate the remaining flank. With any luck, your opponent will see that half his force has been wiped out with relative ease, and will second guess himself into allowing you to eliminate the second flanking element as he tries to regroup rather than pressing the assault.
Finally, there is always the option of castling up and then bringing in reinforcements behind one of your enemy's flanks. The problem with this approach is that there is never any real guarantee when your reinforcements are going to arrive. On the other hand, in a Dawn of War deployment, when most of your army is going to be in reserve anyway, then it's much more likely that an option to bring in forces behind an enemy assault is a real possibility. The trick, however, is to keep the same rules in play that you would for a Break Out. Slow down one element of the pincer, and then overwhelm one of the enemy's flanking forces. If you spread out your attacks, then more than likely your enemy's troops, which he has specifically chosen for their ability to make a long range unsupported assault, will be able to outclass the reinforcements available to you. But when you use an overwhelming attack, then the combined firepower and heavy assault by multiple units can break even the toughest of deathstar units your enemy may choose to throw at you.
Good luck!